SPF Configuration Settings & Setup
Understand your SPF configuration settings and setup SPF record delegation to enable management through Sendmarc
Sections in the article:
To enable management of your SPF record, you'll first need to add your domain to Sendmarc. Once your domain is added you can setup DNS delegation for your SPF record. This means that your SPF record in your DNS is pointed to our servers which contains the settings of your SPF record.
Setup & Verify SPF delegation
Steps to follow:
- Navigate to Domains in the left navigation bar.

- Click on the domain you wish to configure and then click Edit. Or click the Pencil Icon of the domain you wish to edit.

- Click on SPF Settings to confirm the correct settings have been imported/applied and make necessary adjustments where needed.

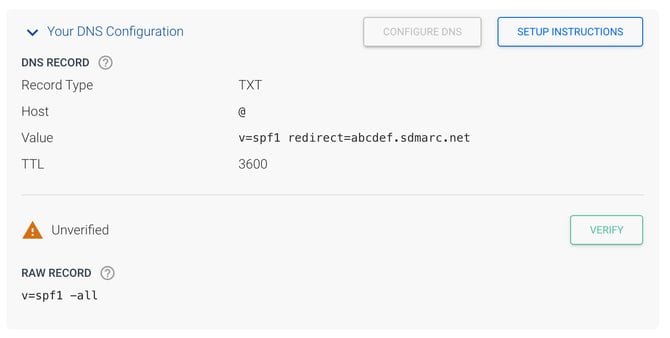
- Once you're happy with your settings expand Your DNS Configuration section to reveal the DNS record required to enable SPF management for your domain. You'll also see a RAW record displayed; this is the hosted record that Sendmarc compiles based on the settings you have set in the platform.

The DNS Configuration section will contain:
- DNS Record - This is the new DNS record to enable SPF delegation.
- Verification Status - Indicates the various states of verification with the date and time of that the last validation occurred.
- Raw SPF Record - Displays the raw SPF record that contains the policy and settings as imported and modified by you. Do NOT use this record, follow the setup instructions to enable delegation.
- Now add the TXT record to your DNS to enable delegation. The process of updating your DNS may differ depending on your hosting provider. Visit the Service Provider Section for more information.
- Click Verify to validate your newly added DNS record. It may take some time for the record to reflect, but Sendmarc will continue to attempt verification in the background.
- Once your setup has been fully verified you've successfully delegated the management of your SPF record to the Sendmarc platform. This will be indicated by a green tick.
Various States of Verification
- Verified - Matching TXT record found and SPF delegation is enabled

- Unverified - No Matching TXT record found

SPF Configuration Settings
Understand the various settings available for your SPF record, these settings will only take affect if DNS delegation has been implemented and verified. Follow the setup instructions above.
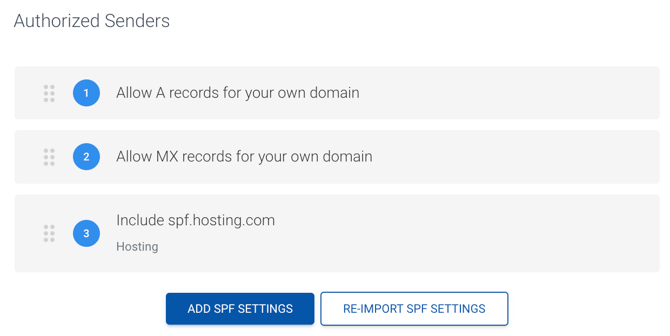
Configuring Authorized Senders
- Automatically imported during domain creation
- Manual Import or Re-Import (If your SPF record has not yet been verified/delegated you can choose to re-import the existing SPF record, by clicking Re-import SPF Settings and Sendmarc's Smart Import Technology will import it for you. It will only import the valid records and Authorized Senders not already on the list.)
- Manually added and configured by you
 |
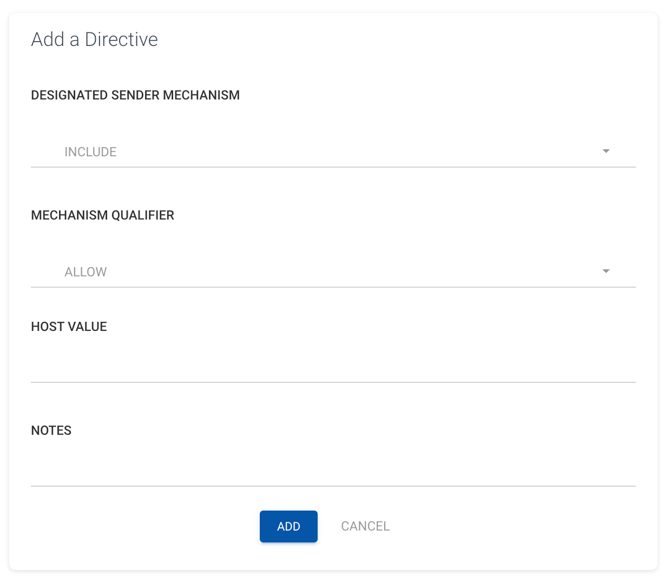
You can modify each of the Authorized senders by holding your cursor over the specific record and clicking on the Pencil icon to edit the directive. This will allow you to verify settings and update the directive accordingly. To change the order of the directives, use the Dotted icon to drag each directive up or down into the correct place.
 |
 |
- Designated Sender Mechanism (Include, Exists, A, MX, ip4, ip6)
- Mechanism Qualifier / Record Qualifiers
- "-" fail
- "~" soft fail
- "?" neutral (Not Recommended)
- "+" pass (Not Recommended)
- Host / Address / Macro Value (Changes based on mechanism selected)
- Notes - Used for notes
SPF Optimization
 |
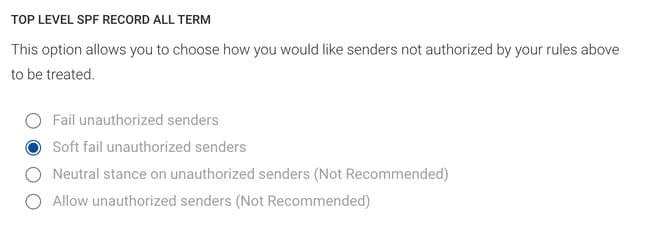
Top Level SPF Record All Term
- "-" fail - Fail unauthorized senders
- "~" soft fail - Soft fail unauthorized senders
- "?" neutral - Neutral stance on unauthorized senders (Not Recommended)
- "+" pass - Allow unauthorized senders (Not Recommended)
 |
Need Help?
support@sendmarc.com is standing by to assist!