| HubSpot is a popular marketing, sales, and service software that helps businesses attract, engage, and delight customers. One important aspect of using HubSpot is ensuring that your emails are properly authenticated to prevent them from being marked as spam or rejected by email providers. One way to do this is by setting up SPF and DKIM authentication to be DMARC compliant. |
 |
| Table of Contents |
1. HubSpot SPF Setup
SPF (Sender Policy Framework) is an email authentication method that allows the owner of a domain to specify which mail servers are authorized to send email on their behalf. It works by adding a TXT record to your domain's DNS (Domain Name System) that lists the IP addresses of the mail servers that are authorized to send email for your domain. By checking the SPF record, email providers can determine if an incoming email is legitimate or not.
In your HubSpot account, click the settings icon in the main navigation bar.
- In the left sidebar menu, navigate to Website > Domains & URLs.
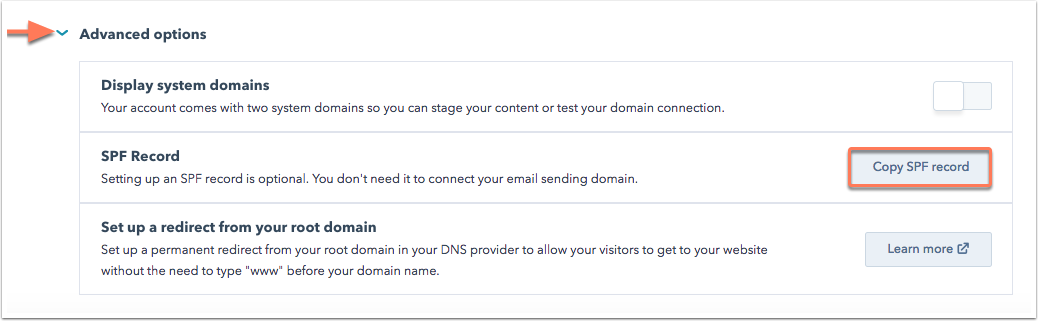
- Scroll down to the bottom of the page and click Advanced Options.
- Click Copy SPF record to copy the record to your clipboard.
- If you're a new sender configuring your SPF record for the first time, add "v=spf1" before you paste the value you copied from HubSpot. The resulting SPF record will be set up like this:
Tables can't be imported directly. Please insert an image of your table which can be found here.
- If you've previously set up an SPF record, you'll only need to update the include part of your SPF record with the value you copied from HubSpot.
2. HubSpot DKIM Setup
DKIM (DomainKeys Identified Mail) is another email authentication method that uses a digital signature to ensure that an email was not modified during transit. It works by adding a DKIM-Signature header to the email and a TXT record to your domain's DNS that contains the public key used to verify the signature. By checking the DKIM signature, email providers can determine if an incoming email is legitimate or not.
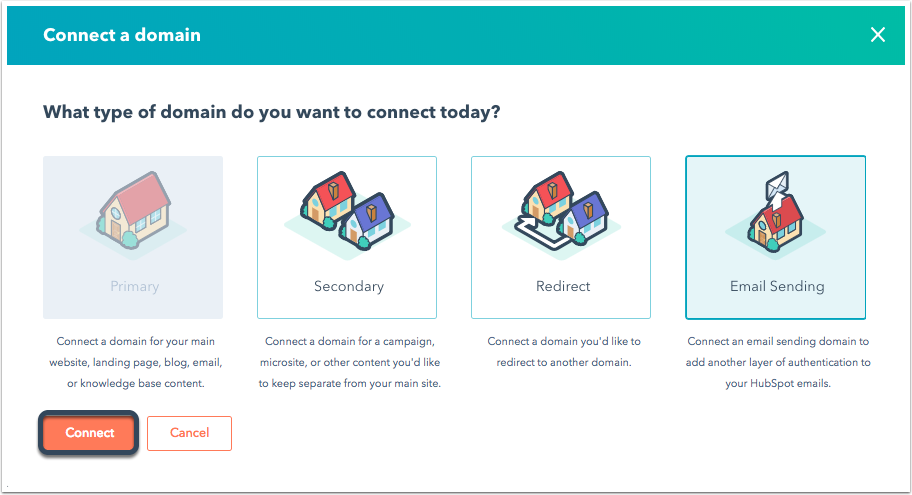
To connect an email-sending domain:
- In your HubSpot account, click the settings icon in the main navigation bar.
- In the left sidebar menu, navigate to Website > Domains & URLs.
- In the top right, click Connect a domain.
- In the dialog box, select Email Sending, then click Connect.
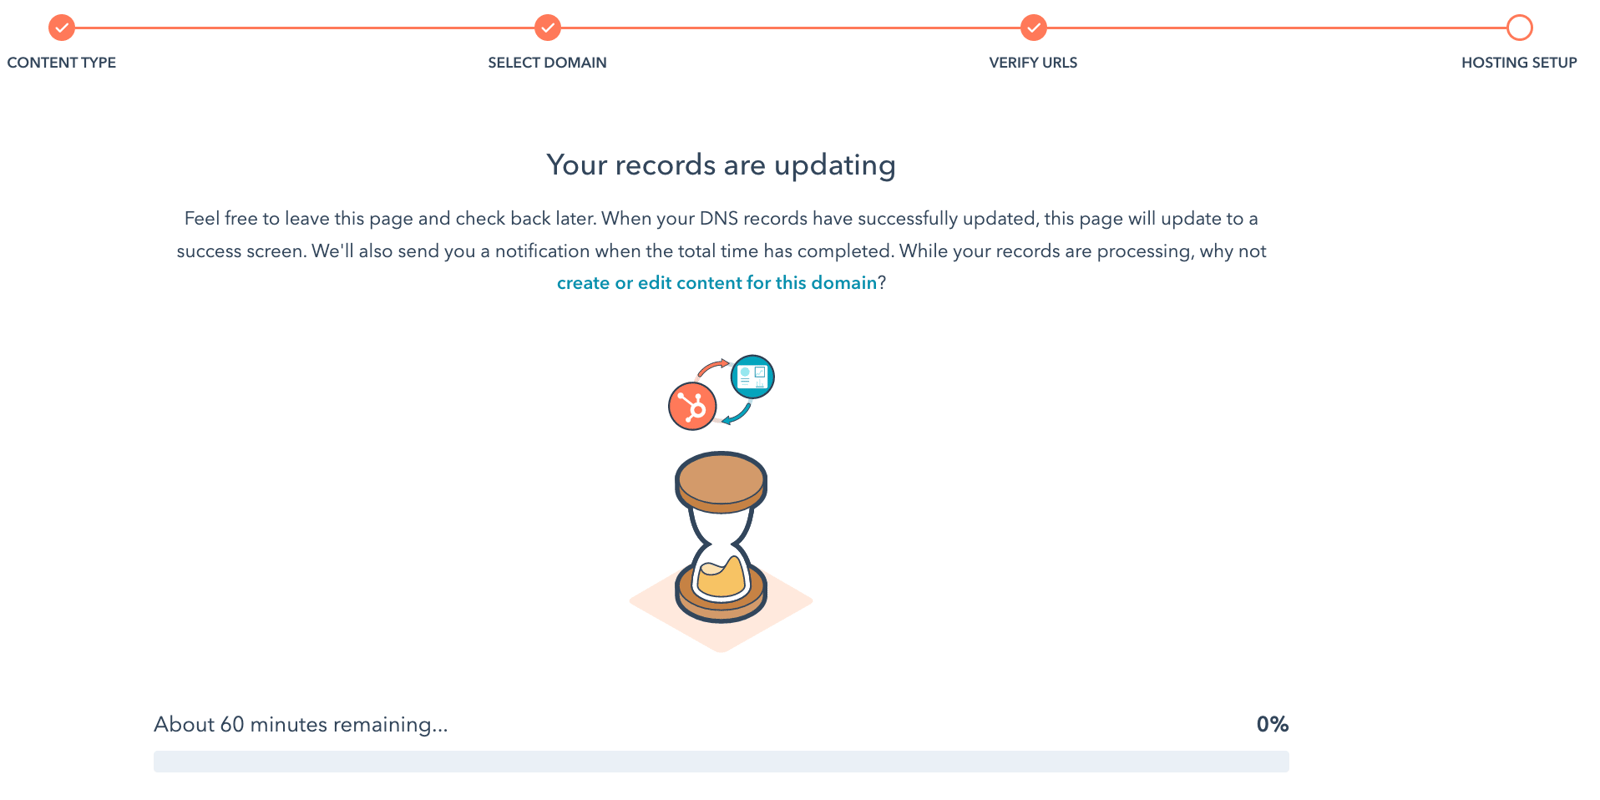
- On the domain connection screen, enter an email address you use to send marketing emails, then click Next.
- Verify that the email sending domain is correct, then click Next.
- In a separate tab, log in to your DNS provider and locate your DNS record settings. Learn more about adding DNS records to specific providers.
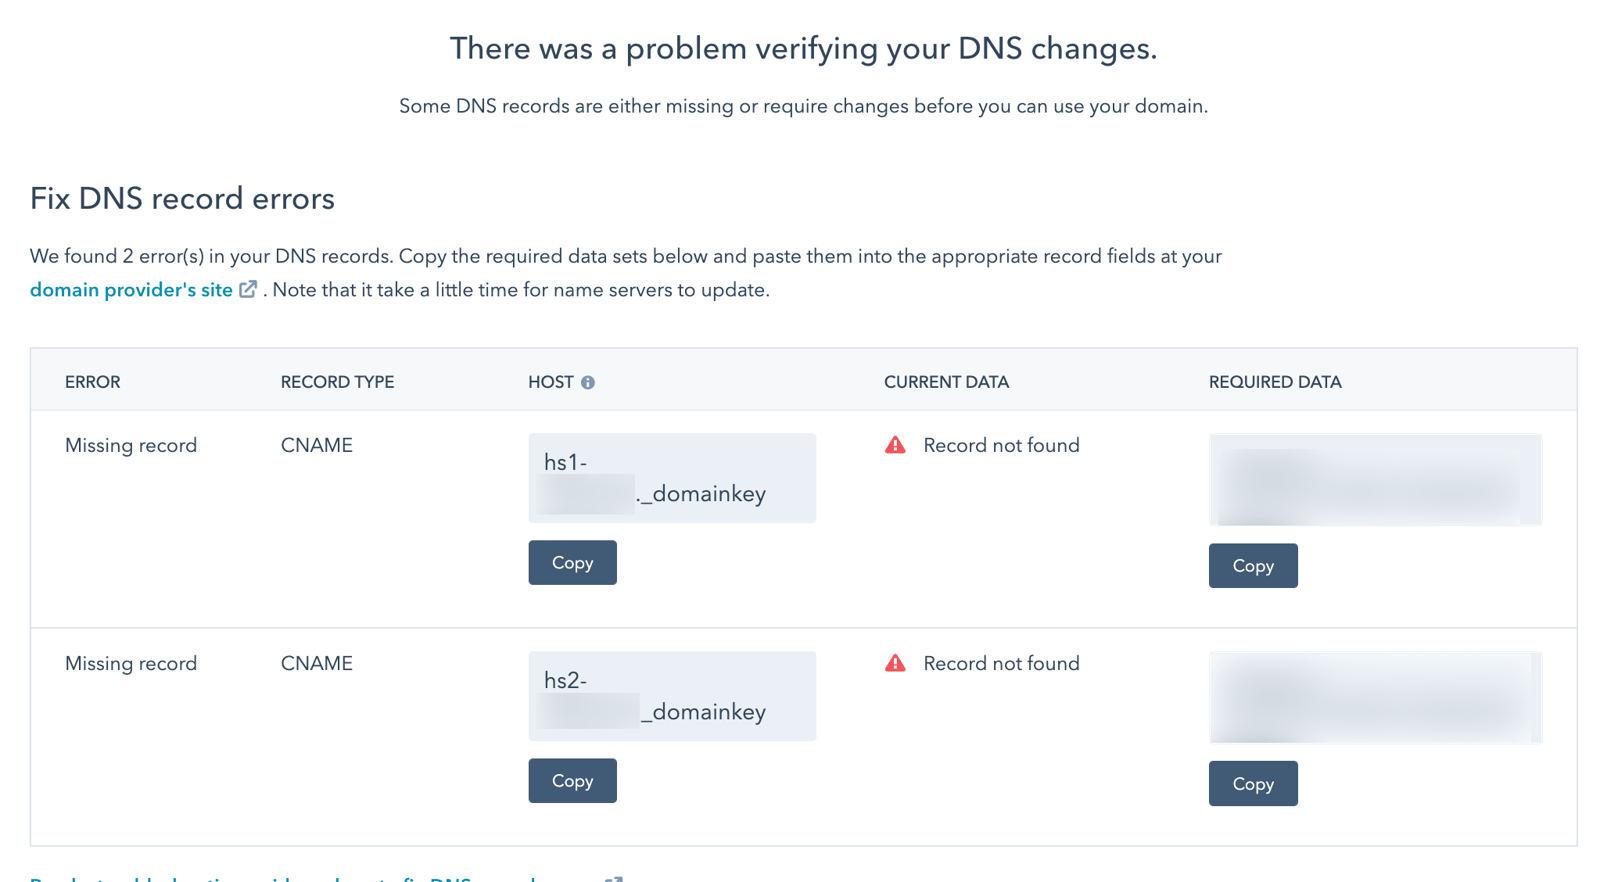
- Copy the values in the Host and Required Data columns in HubSpot. In your DNS provider account, paste the values into the appropriate record fields for the CNAME record of the subdomain you're connecting. Once you've entered the values into the CNAME record, click Verify.
You can see a thorough breakdown of any faults that transpired if there are any issues confirming your DNS settings.
For a more thorough explanation of some issues, mouse over the warning alert icon in the Current data column.
Find out more about fixing DNS problems.
To set up SPF and DKIM authentication on HubSpot, you need to follow the instructions provided in the above-mentioned articles. However, it's important to note that, to be fully DMARC compliant, you need to monitor DMARC reports that are sent by receiving domains and also act upon them.
It's also important to regularly review your SPF and DKIM records to ensure that they are up-to-date and accurate. This will help prevent any issues with email deliverability and maintain the integrity of your domain.