|
Thrive digitally as we guide your business with the right marketing & sales tools. |
 |
| Table of Contents |
1. Sendinblue SPF Setup
To include the sendinblue mail servers in your SPF record, simply add this include statement to your SPF record at your domain's DNS host:
| For adding Sendinblue to existing SPF record | include:sendinblue.com |
2. Sendinblue DKIM Setup
Follow these steps to configure DKIM signing with Sendinblue:
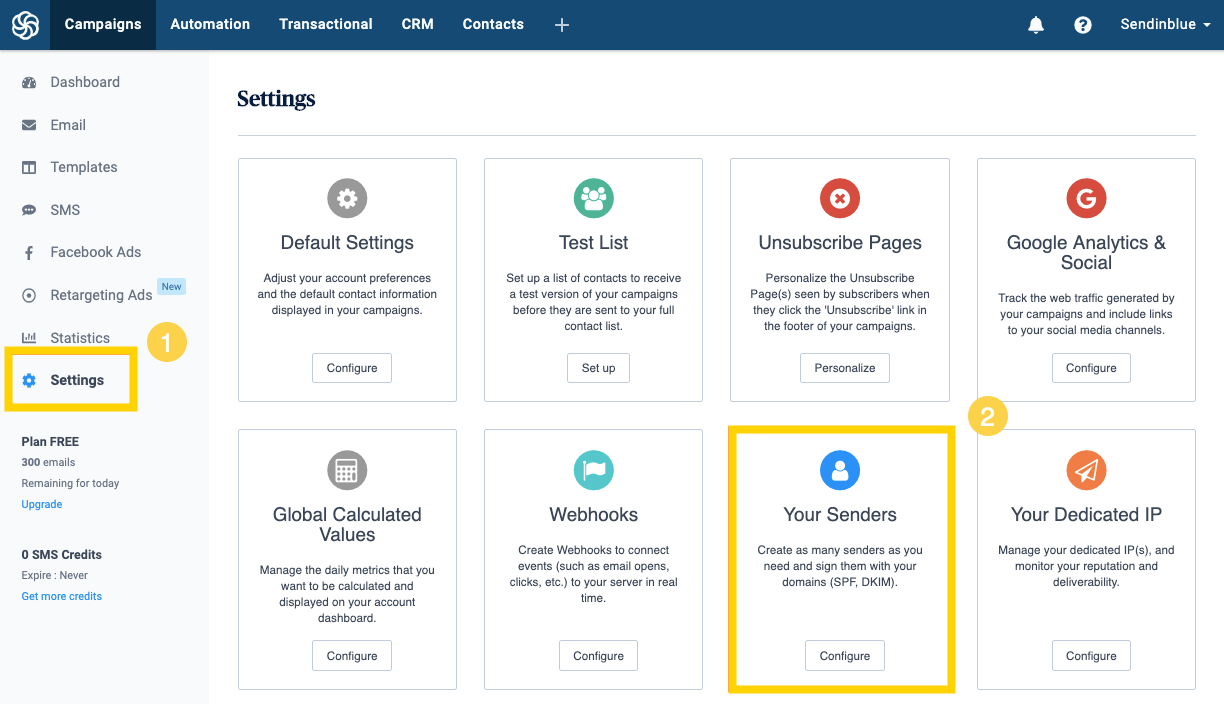
In the Sendinblue interface;
- Go to Campaigns > Settings
- Click on Configure in the Your Senders box.
- Click on Domain
- Select Add a new domain
After clicking on Add a new Domain, the sender editing window will pop up and by default, your emails are signed by:
- Sendinblue or;
- the domain name associated with your dedicated IP address.
Customize your DKIM signature
- Check the box: I would like to use this domain name to sign my emails.
- Now enter the domain name you wish to use to sign your emails
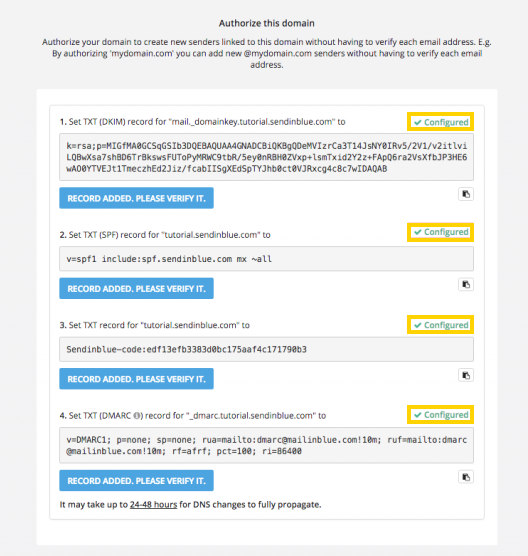
- When you click on the save button, a pop-up will appear with the DNS entries to be added to your domain host.
- Once the configuration is complete, a green check will appear next to the DKIM, SPF, and Verify Code keys
- Click on DONE.
- Finally, don't forget to update your senders. This can be done by clicking Manage > Edit > Save on any sender with the authenticated domain
Once you have completed the DNS Record setup please let us know in order to have the record confirmed and finalized.
* Please ensure that you change <yourdomain.com> to the correct domain before publishing changes.