| Trustwave is a leading cybersecurity and managed security services provider focused on threat detection and response. Offering a comprehensive portfolio of managed security services, consulting and professional services, and data protection technology, Trustwave helps businesses embrace digital transformation securely. |
| Table of Contents |
1. MailMarshal DKIM Setup
To create a key and selector:
- In the SEG Configurator, open the properties for the local domain and select the DKIM tab.
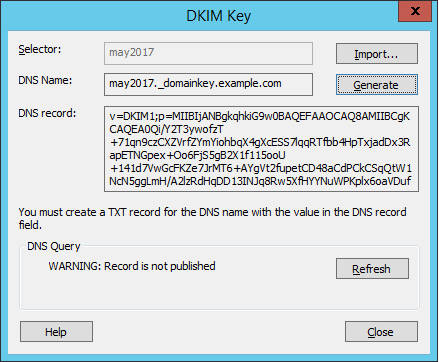
- Click New to open the DKIM Key window.
- Enter a unique selector, such as a date string.
- Click Generate to create the key and record text.
SEG generates 2048 bit keys by default. In SEG 8.2 and above you can select other sizes when generating a key. To learn how to change the size generated in SEG 8.0 and 8.1, see Related Articles below. - Copy the information required to create the DNS record (to capture all text, right click > select all).
Once the DNS record has been created and verified to be available in public DNS, you can enable the key from the DKIM tab.
- SEG validates the public availability of the key using a query to public DNS from the Array Manager, by default using Google DNS (8.8.8.8).
- Using a public DNS server (not the DNS configured in SEG for delivery) helps to test that the key has replicated widely.
- You can change the DNS server used. See the Notes section below.
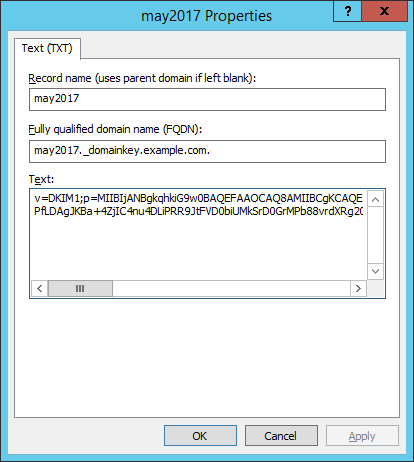
2. Creating the DNS record(s)
A DNS Resource Record is required for each local domain from which you are planning to send DKIM signed messages.
Copy the information from the DNS Record field of the DKIM Key window in the Configurator.
For example, in Windows DNS Manager, expand the zone for the desired local domain, add a resource record of type TEXT, and paste the information from SEG. The text of the record may include more than one line.
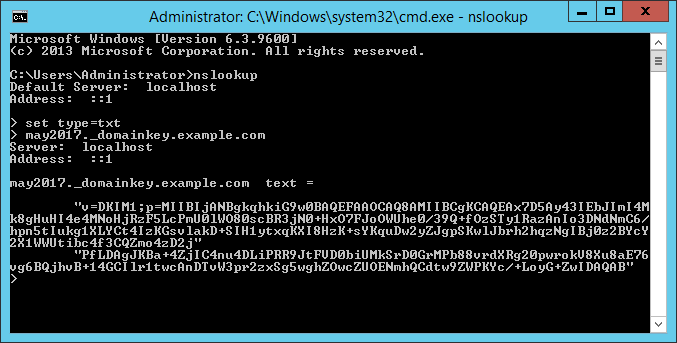
- 2048 bit keys are longer than the permitted line length for many DNS servers. Long keys copied from SEG are formatted with a linebreak and can be pasted directly to Microsoft DNS and many other DNS servers. However, some DNS software may change the linebreak to a space or make other changes. Be sure to verify the actual DNS record using NSLookup or a web-based DKIM checker.
- Looking up the record with NSLookup returns a result as shown below:
Notes:
- You can use the same key for all domains, or create separate keys.
- Add a DNS record and local domain information for each local domain where you want to use DKIM to sign outgoing messages.
- Ensure that DNS and local domain configuration is in place before creating any signing rules for a domain.
- You must create rules to sign messages.