This article explains what DKIM is, how to set it up, and provides details on some of the ways it can affect your Emma account. |
 |
| Table of Contents |
|
DKIM stands for DomainKeys Identified Mail and is an authentication method that helps ensure the sender's email address is legitimate and not being spoofed by a third party.
The DKIM method works through a digital signature that’s attached to the header of each email sent from Emma. The system receiving the email can check that signature against the sender’s public key which is part of the DNS system. Essentially, it lets an organization (in this case, Emma) take responsibility for a message that is in transit.
The main benefit of using DKIM is its ability to prevent scammers, specifically phishers, from spoofing your organization and also can lead to potential improvements to your overall deliverability, which means fewer emails sent to spam folders.
Emma DKIM Setup
Before you can set up DKIM in your Emma account, you will need to create three CNAME records with your web hosting or domain provider.
Your three CNAME records should be associated with your sending domain and look like this:
| Record Type | Name | Value | TTL |
| CNAME | e2ma-k1._domainkey | e2ma-k1.dkim.e2ma.net | Default |
| CNAME | e2ma-k2._domainkey | e2ma-k2.dkim.e2ma.net | Default |
| CNAME | e2ma-k3._domainkey | e2ma-k3.dkim.e2ma.net | Default |
Please note: Depending on what your DNS software prefers, your host name may slightly vary and instead show as: e2ma-k1._domainkey.yourdomain
How to create a TXT record
You will also need a TXT record to set up DKIM, which you can create from the validation hash code in your Emma account by following these steps:
- Log into Emma and select the Account page from the dropdown menu next to your name.
- Click on the last tab for DKIM to reveal your validation hash code.
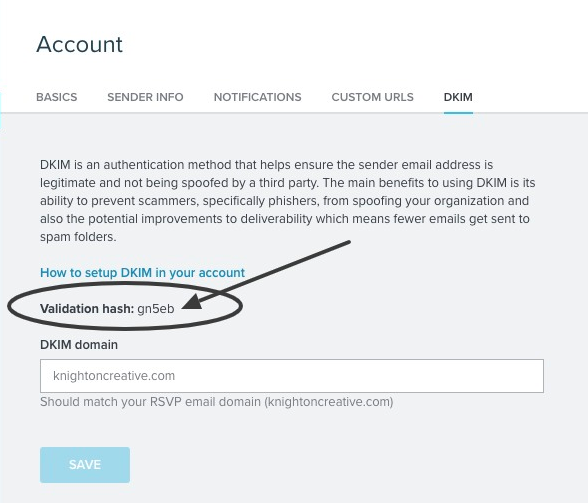
- Once you have that code, add a TXT record that contains the following value for your domain: e2ma-verification=xxxx and be sure to replace “xxxx” with your validation hash code.
- Once completed, allow your CNAME changes to propagate through the DNS network. That can take anywhere from a few minutes to several hours.
While optional, we also recommend updating your SPF record with our unique URL. To do this, your IT team would just need to include "e2ma.net" on your existing SPF.
If you come across any issues, it's best to contact your provider to learn more about the CNAME and TXT record process, as they may have different requirements.
How to activate the DKIM process
- Navigate back to your Account page and select the DKIM tab.
- Enter your sender domain (mydomain.com) in the DKIM domain field.
- Clicking to Save will kick off a validation process where Emma checks to see if your CNAME and TXT records are active.
- If everything looks good, you’ll see a success message.
Emma SPF Setup
On the same modal window that appeared earlier for the CNAME you will have seen the instructions for setting up SPF as well. All you have to do is open that window again and copy and paste the information in your DNS. The SPF record will look similar to the record below:
| For adding Emma to existing SPF record | include:e2ma.net |
Once you have created your CNAME records and configured SPF, you should click on Authenticate Domain in the same modal window.
For more information please refer to Emma's guide on how to setup SPF and DKIM.