| Salesforce provides customer relationship management service and also sells a complementary suite of enterprise applications focused on customer service, marketing automation, analytics, and application development. |  |
| Table of Contents |
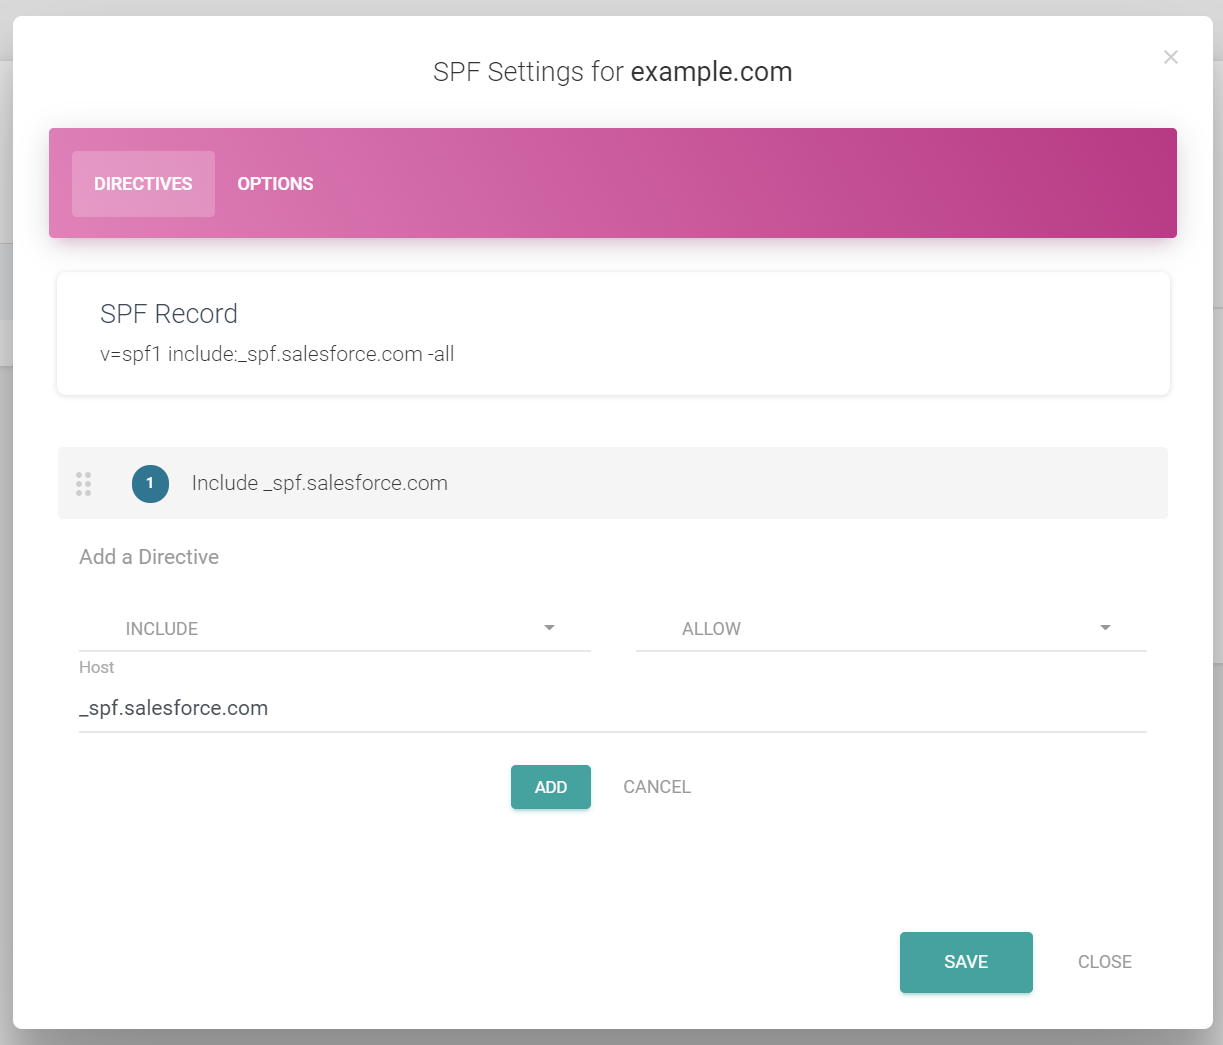
1. Salesforce SPF Setup
Please note that the following SPF changes should only be applied to the Sendmarc record within Sendmarc and not the hosting provider.
| Include String | v=spf1 include:_spf.salesforce.com ~all |
2. Salesforce DKIM Setup
2.1 Enable Signing and Publish Record
To enable DKIM signing on Salesforce requires access to a user account with the 'Customize application' and 'Manage DKIM Keys' authority.
- From Setup, enter DKIM Keys in the Quick Find box, and then select "DKIM Keys".
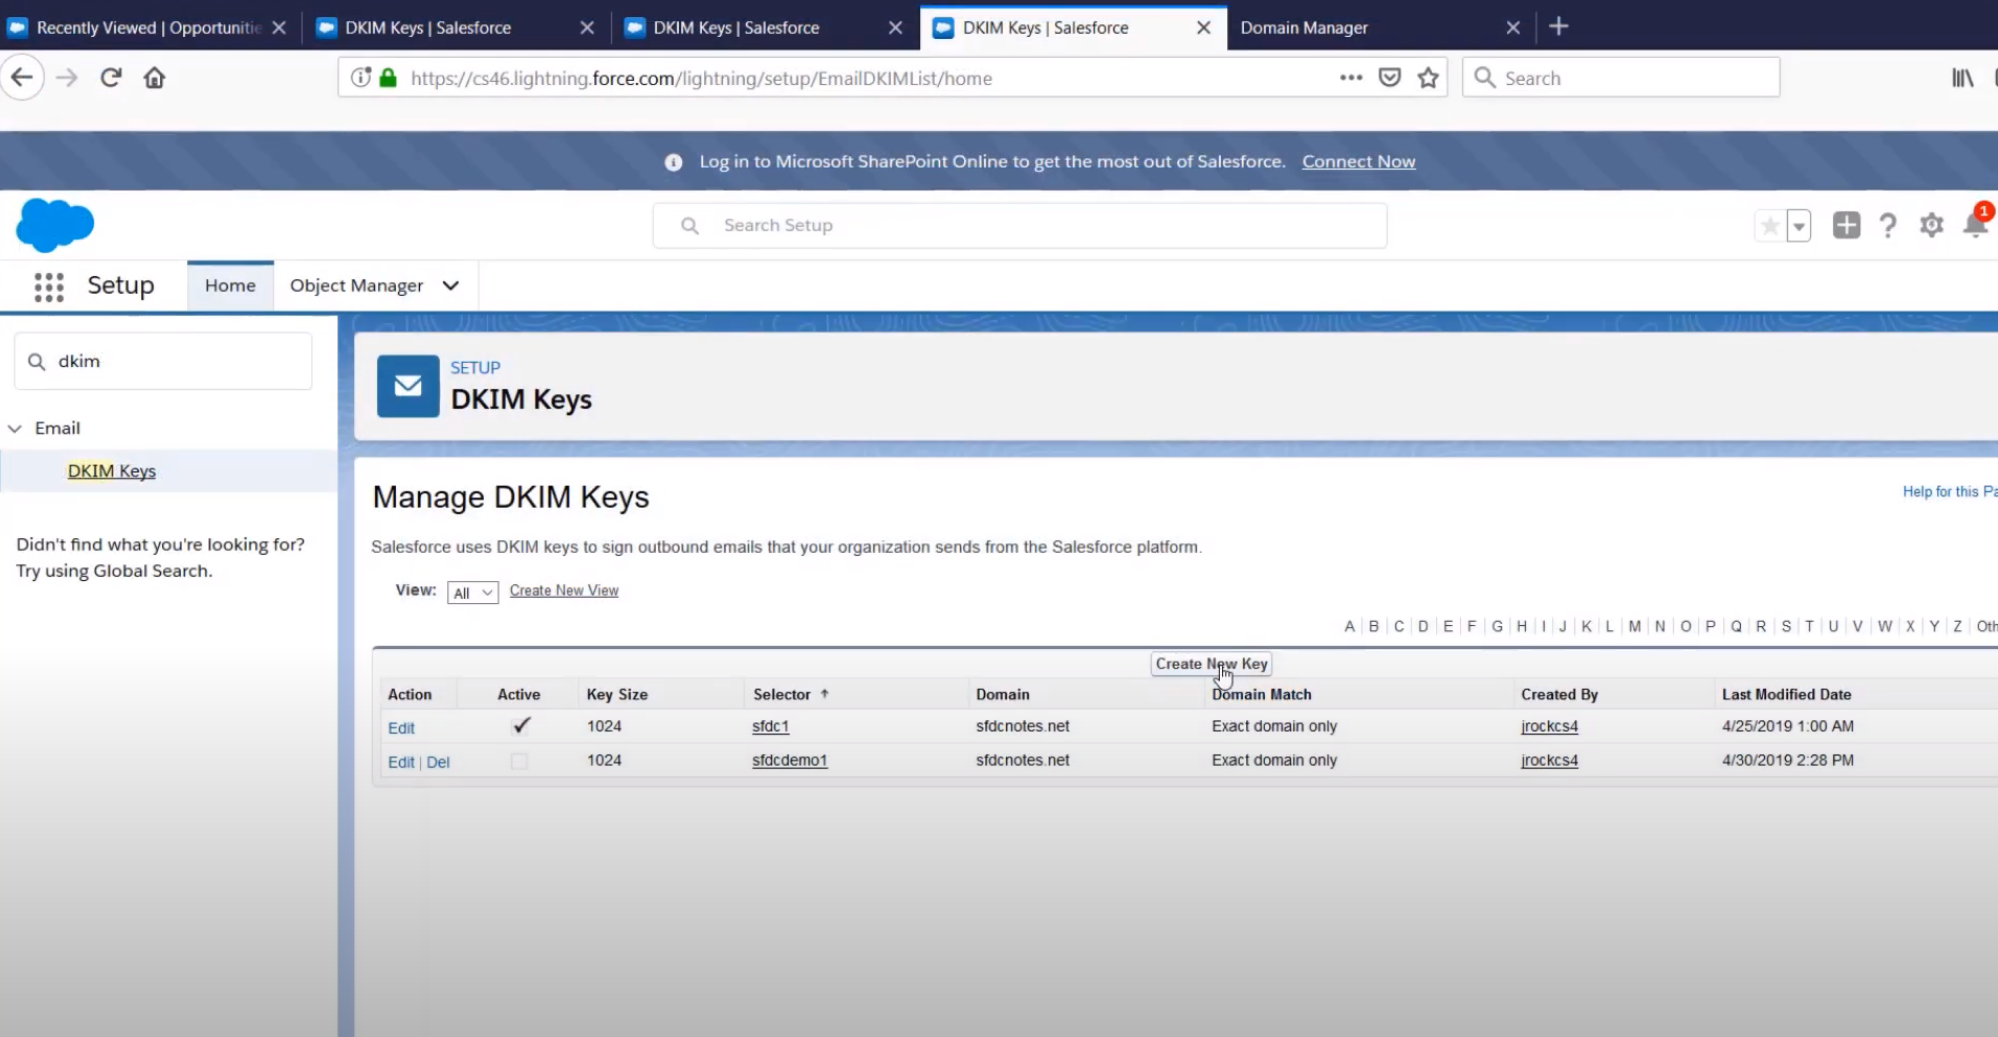
- Click "Create New Key".
- Select the RSA key size. Consider email recipient limitations and industry-specific security regulations when choosing the key size.
- For "Selector", enter a unique name.
- For Alternate Selector, enter a unique name. The alternate selector allows Salesforce to auto-rotate your keys.
- Enter your domain name.
- Select the type of domain match you want to use.
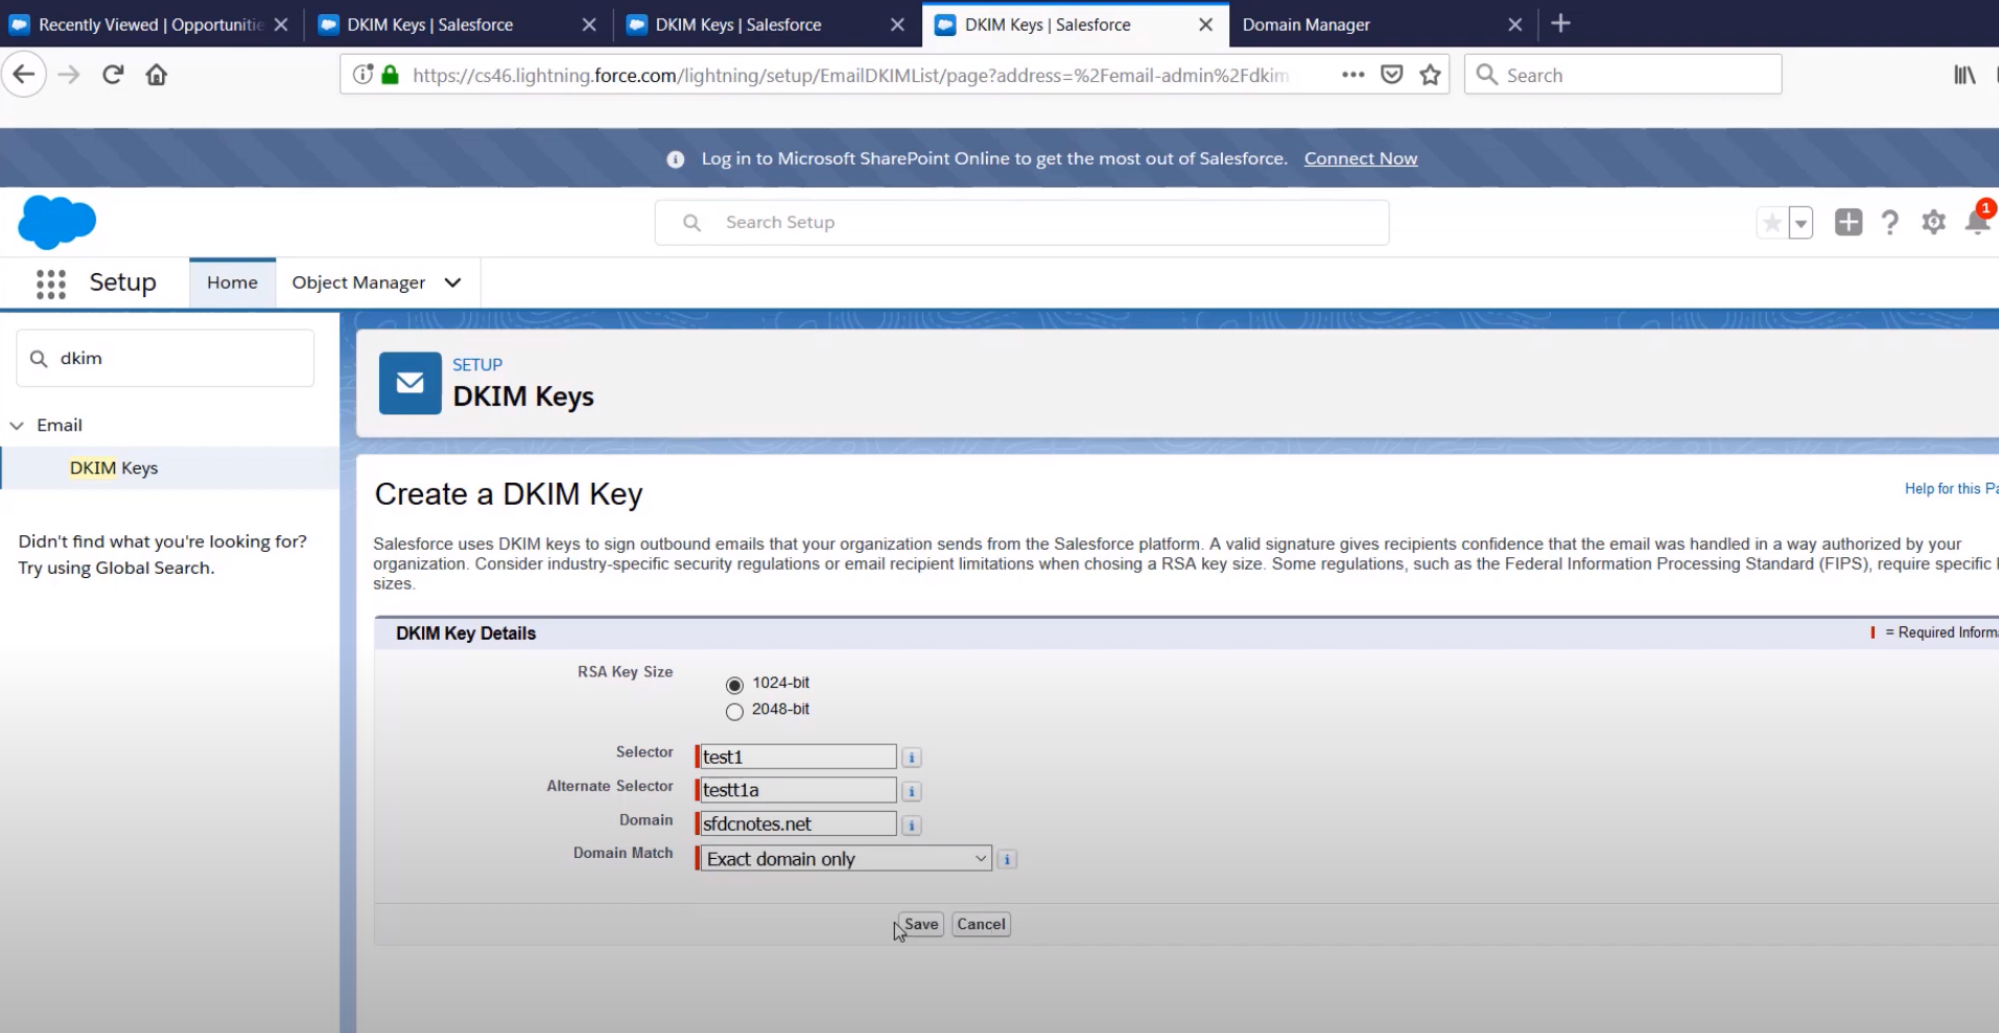
- Click "Save". Your CNAME and alternate CNAME records appear on the DKIM Key Details page when the DNS publication is complete.
- Publish the CNAME and alternate CNAME records to your domain’s DNS.
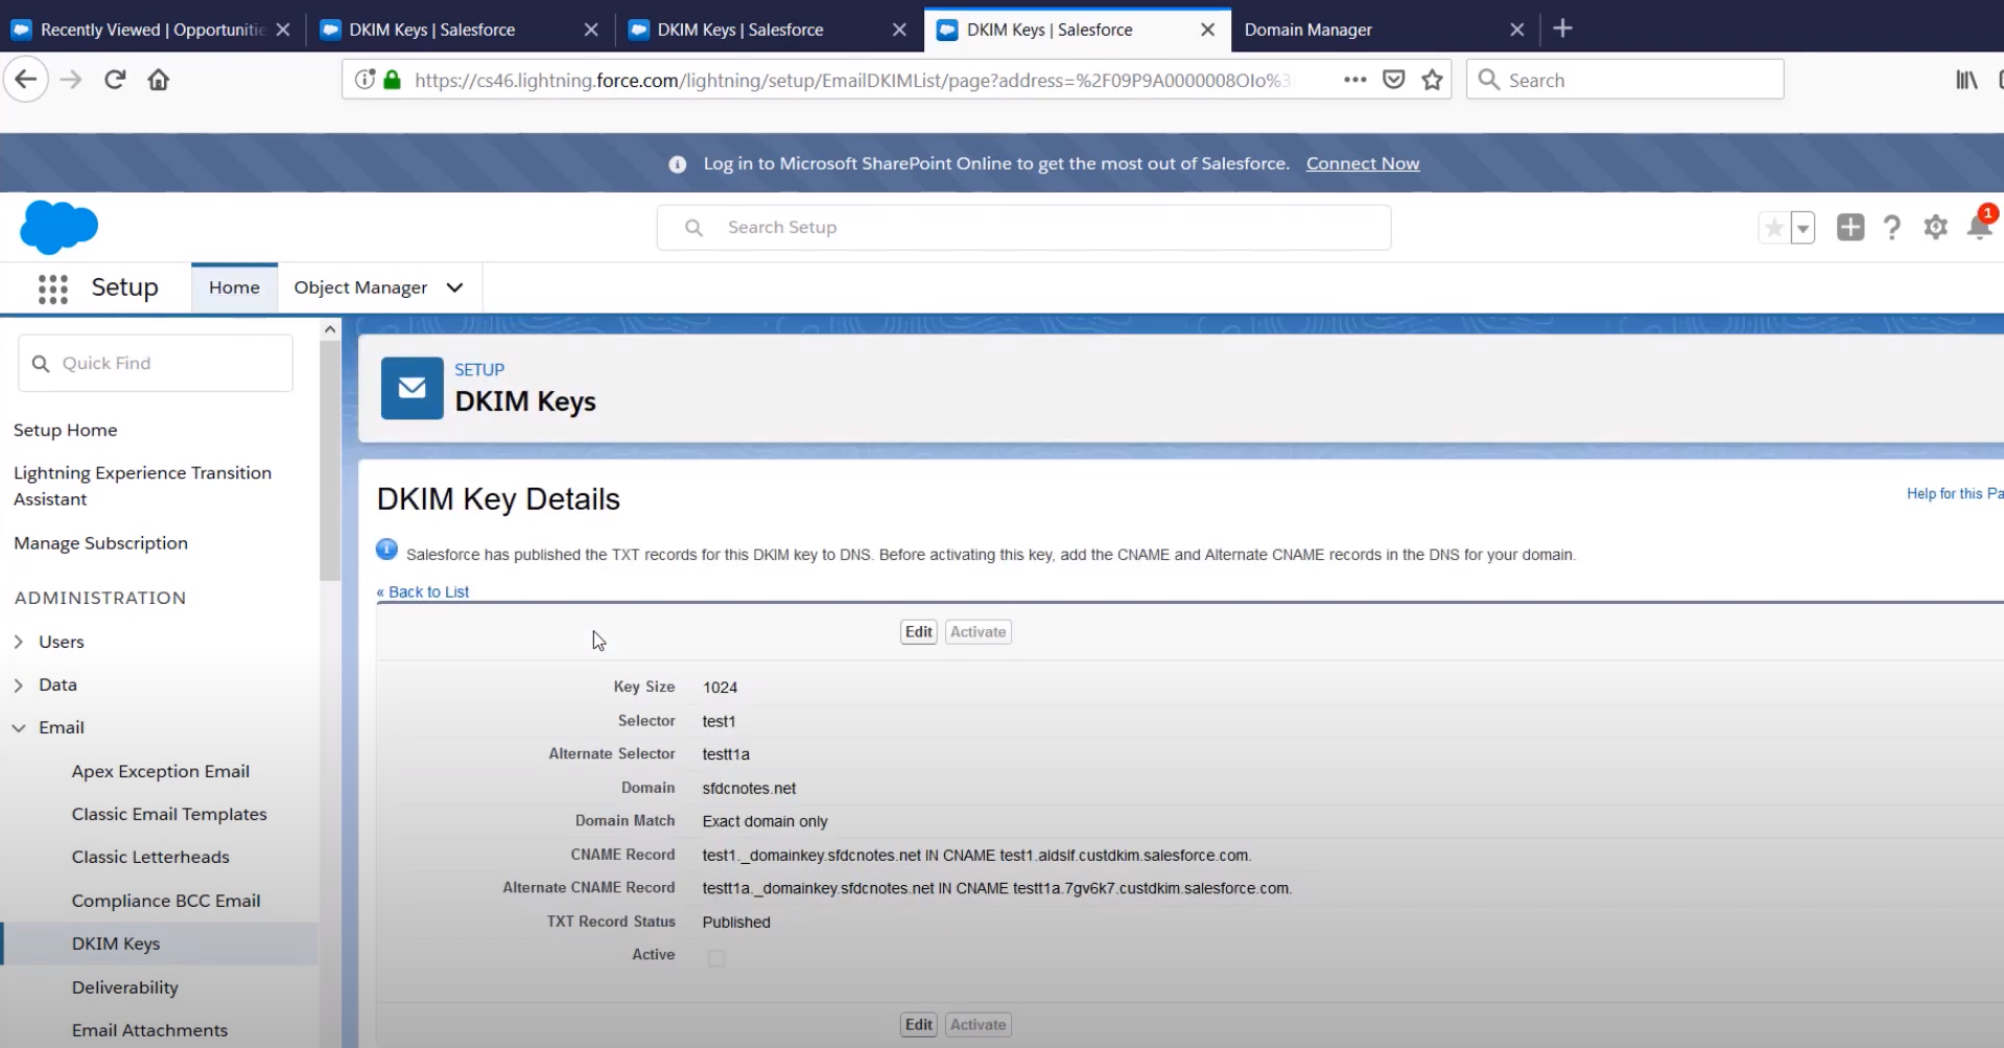
- Select "Activate" on the DKIM Key Details page.