| To enable Amazon SES to send authenticated mail from your domain your SPF and DKIM settings must be enabled. |  |
| Table of Contents |
1. Amazon SES SPF Setup
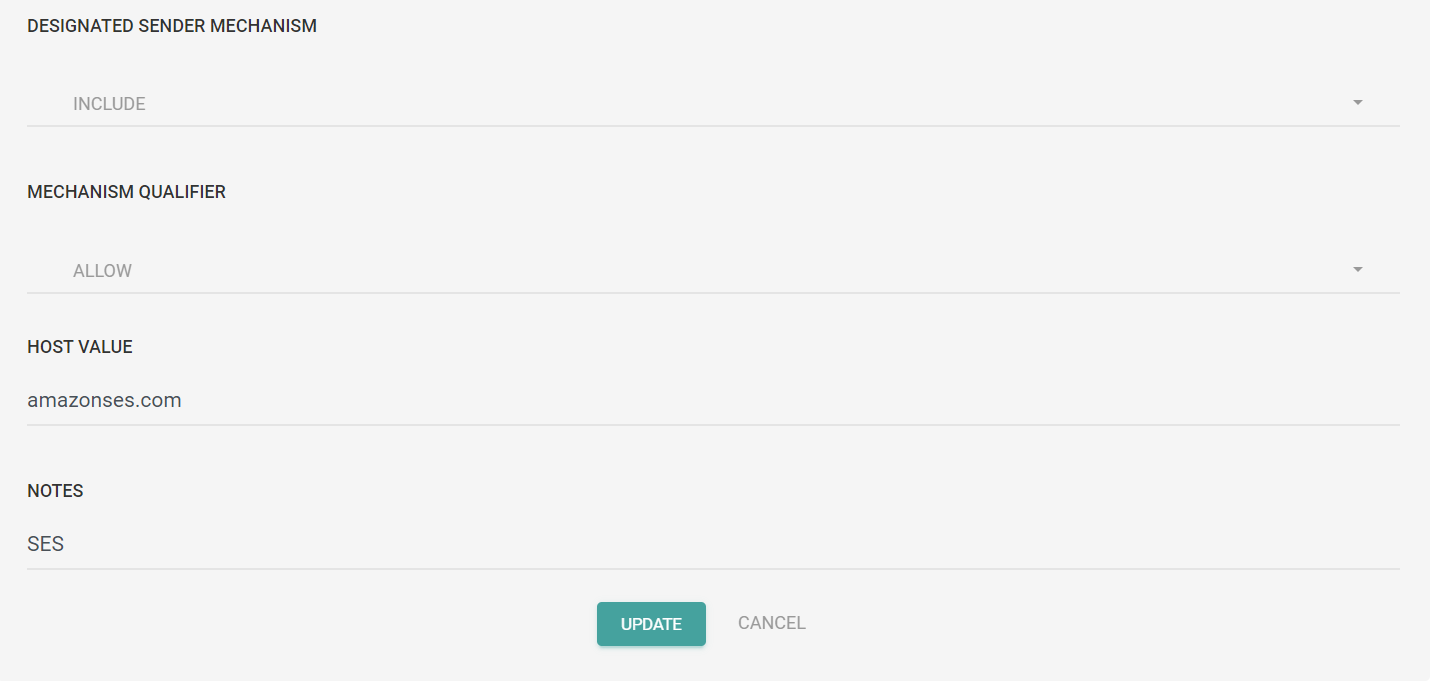
Please note that the following SPF changes should only be applied to the Sendmarc record within Sendmarc and not the hosting provider.
| Include String | include:amazonses.com -all |
2. Amazon SES DKIM Setup
DKIM digitally signs emails from your Amazon SES service with your domain name(s) and build your brand identity in all your communication with customers. Amazon SES supports DKIM (Domain Key identified Mail) thereby being DMARC (Domain-based, Message Authentication, Reporting, and Conformance) compliant, making your organization capable of authenticating your communication with your customers.
A quick guide to setting up DKIM in Amazon SES
To set up DKIM you need to first update your DNS records with the Amazon SES domain key so that it can be located and used for verifying signatures.
The UI and terminology might change across different domain registrars but the essential setup would remain more or less the same. Follow the procedure below to spoof-proof your emails:
To set up Easy DKIM for a domain
- Sign in to the AWS Management Console and open the Amazon SES console at https://console.aws.amazon.com/ses/.
- In the navigation pane, under Configuration, choose Verified identities.
- In the list of identities, choose an identity where the Identity type is Domain.
- Under the Authentication tab, in the DomainKeys Identified Mail (DKIM) container, choose Edit.
- In the Advanced DKIM settings container, choose the Easy DKIM button in the Identity type field.
- In the DKIM signing key length field, choose either RSA_2048_BIT or RSA_1024_BIT.
- In the DKIM signatures field, check the Enabled box.
- Choose Save changes.
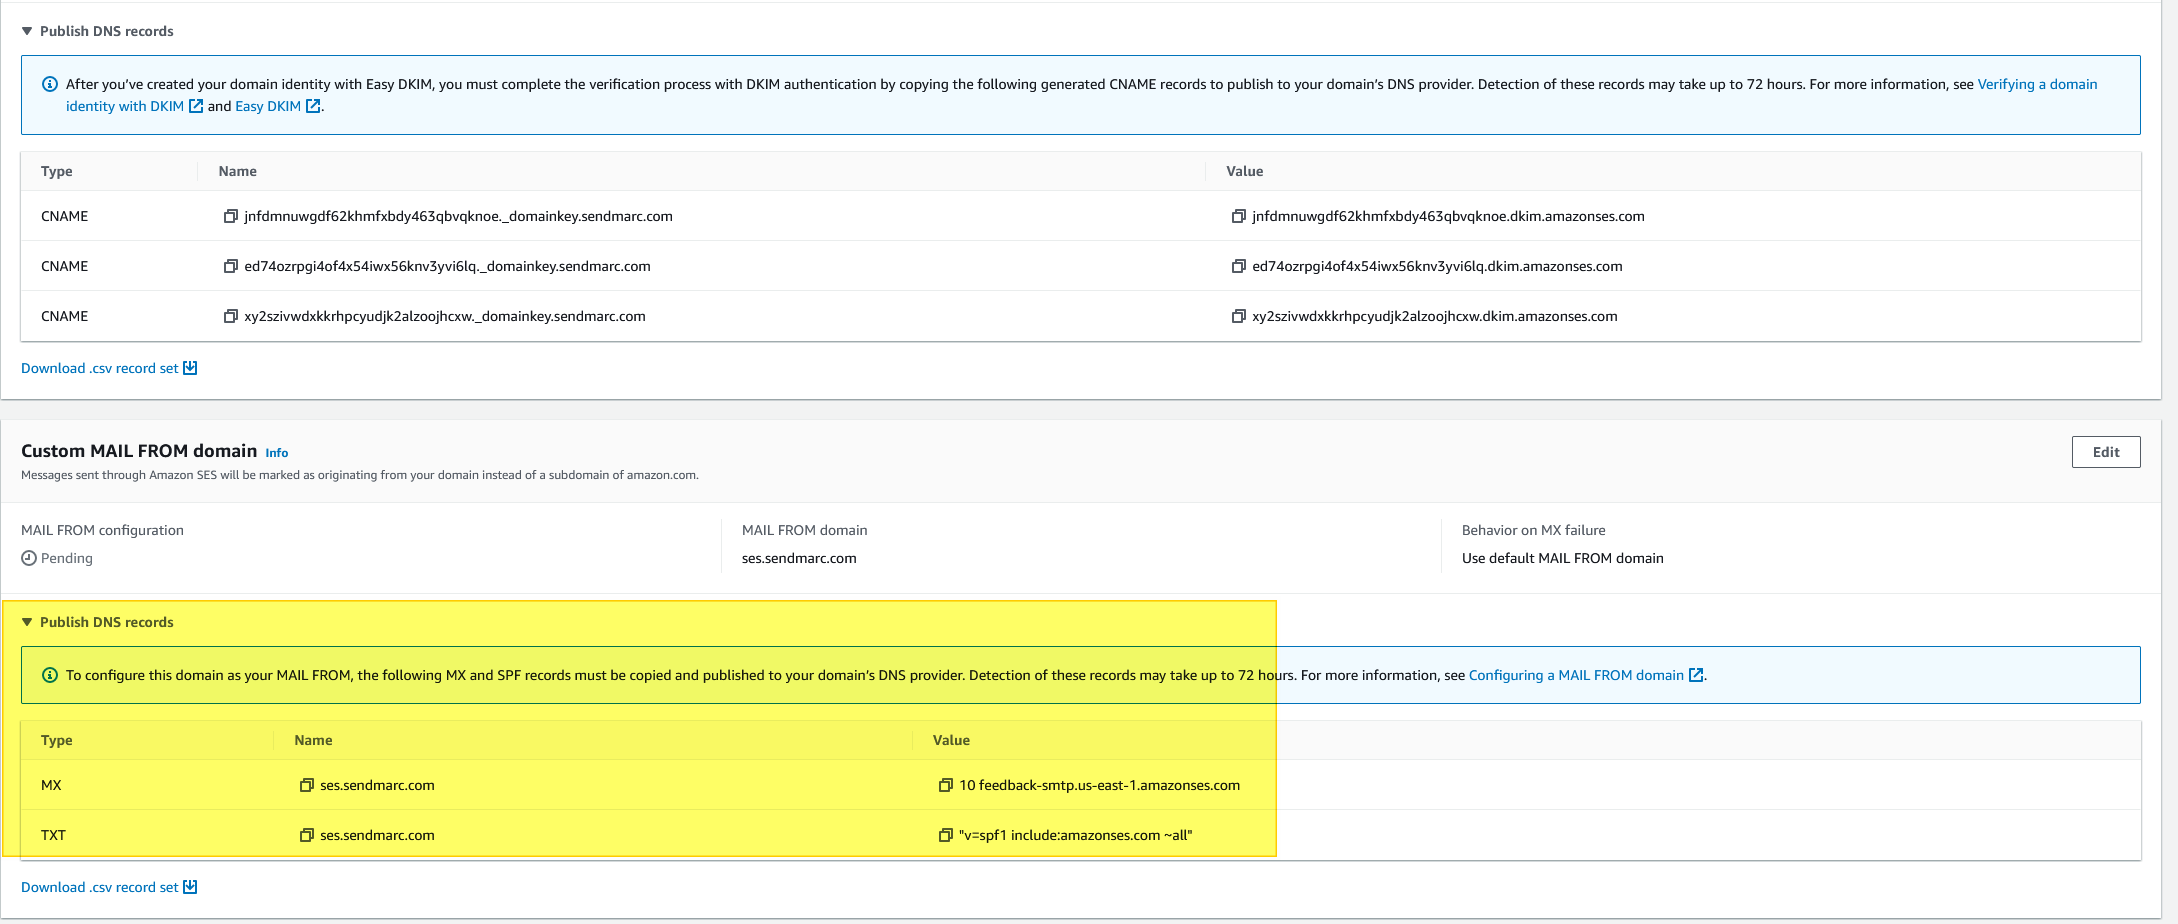
Now that you’ve configured your domain identity with Easy DKIM, you must complete the verification process with your DNS provider - proceed to Verifying a DKIM domain identity with your DNS provider and follow the DNS authentication procedures for Easy DKIM.
3. Domain Based Identities with Amazon SES
Creating a domain identity
Part of creating a domain identity is configuring its DKIM-based verification. DomainKeys Identified Mail (DKIM) is an email authentication method that Amazon SES uses to verify domain ownership, and receiving mail servers use to validate email authenticity. You can choose to configure DKIM by using either Easy DKIM or Bring Your Own DKIM (BYODKIM), and depending on your choice, you'll have to configure the signing key length of the private key as follows:
To create a domain identity
- Sign in to the AWS Management Console and open the Amazon SES console at https://console.aws.amazon.com/ses/.
- In the navigation pane, under Configuration, choose Verified identities.
- Choose Create identity.
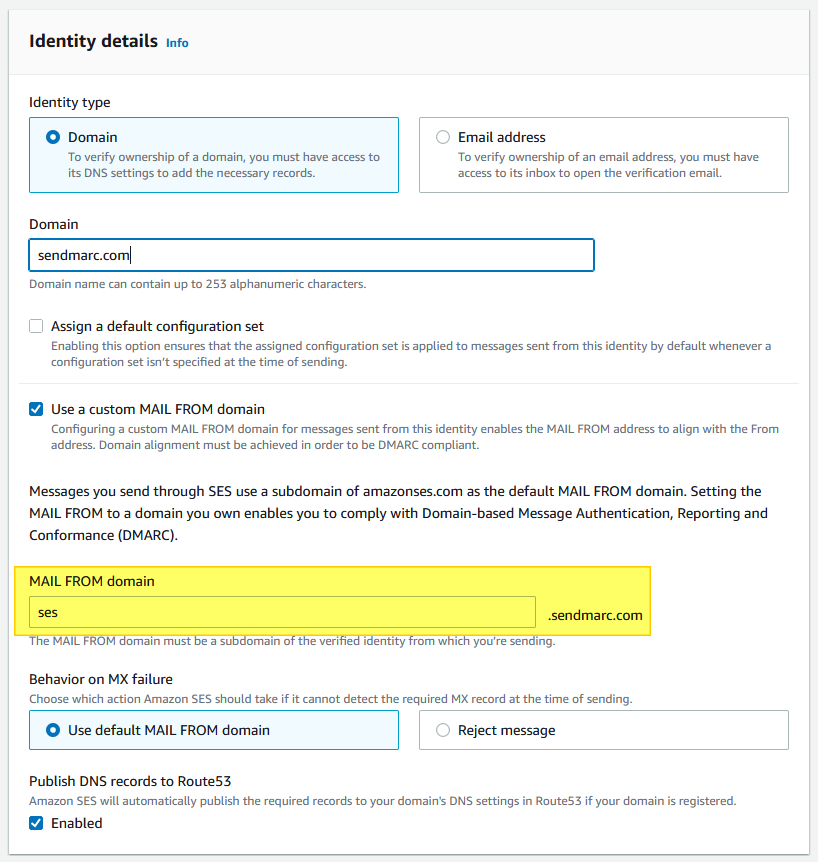
- Under Identity details, select Domain as the type of identity you want to create. You must have access to the domain’s DNS settings to complete the domain verification process.
- Enter the name of the domain or subdomain in the Domain field.
- If you want to use a custom MAIL FROM domain, select the check box and complete the following steps.
- For the MAIL FROM domain, enter the subdomain that you want to use as the MAIL FROM domain. This must be a subdomain of the domain identity that you’re verifying.
- The MAIL FROM domain shouldn't be a domain from which you send emails.
- For Behavior on MX failure, indicate which action Amazon SES should take if it can’t find the required MX record at the time of sending. Choose one of the following options:
- Use default MAIL FROM domain - If the custom MAIL FROM domain's MX record is not set up correctly, Amazon SES will use a subdomain of amazonses.com. The subdomain varies based on the AWS Region in which you use Amazon SES.
- Reject message - If the custom MAIL FROM the domain's MX record is not set up correctly, Amazon SES will return a MailFromDomainNotVerified error. If you choose this option, emails that you attempt to send from this domain are automatically rejected.
- Ensure that the Enabled box is checked in the DKIM signatures field.
- (Optional) Add one or more Tags to your domain identity by including a tag key and an optional value for the key:
- Choose Add new tag and enter the Key. You can optionally add a Value for the tag.
- Repeat for additional tags not to exceed 50, or choose Remove to remove tags.
- Choose Create identity.
Once you have completed domain identity creation your configuration should look similar to the below:
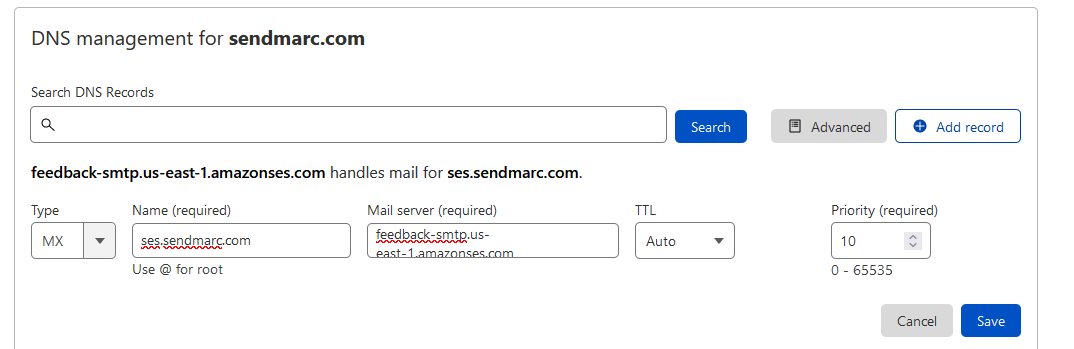
Once you have completed all of these tasks you will have DKIM and full alignment across your Amazon SES environment.